A NIGHT PHOTO, CHECKED BEFORE ORDERING
Should You Brighten a Night Photo Before Making a Phone Case?
Photo DIY · $35 per case
Create your night photo case →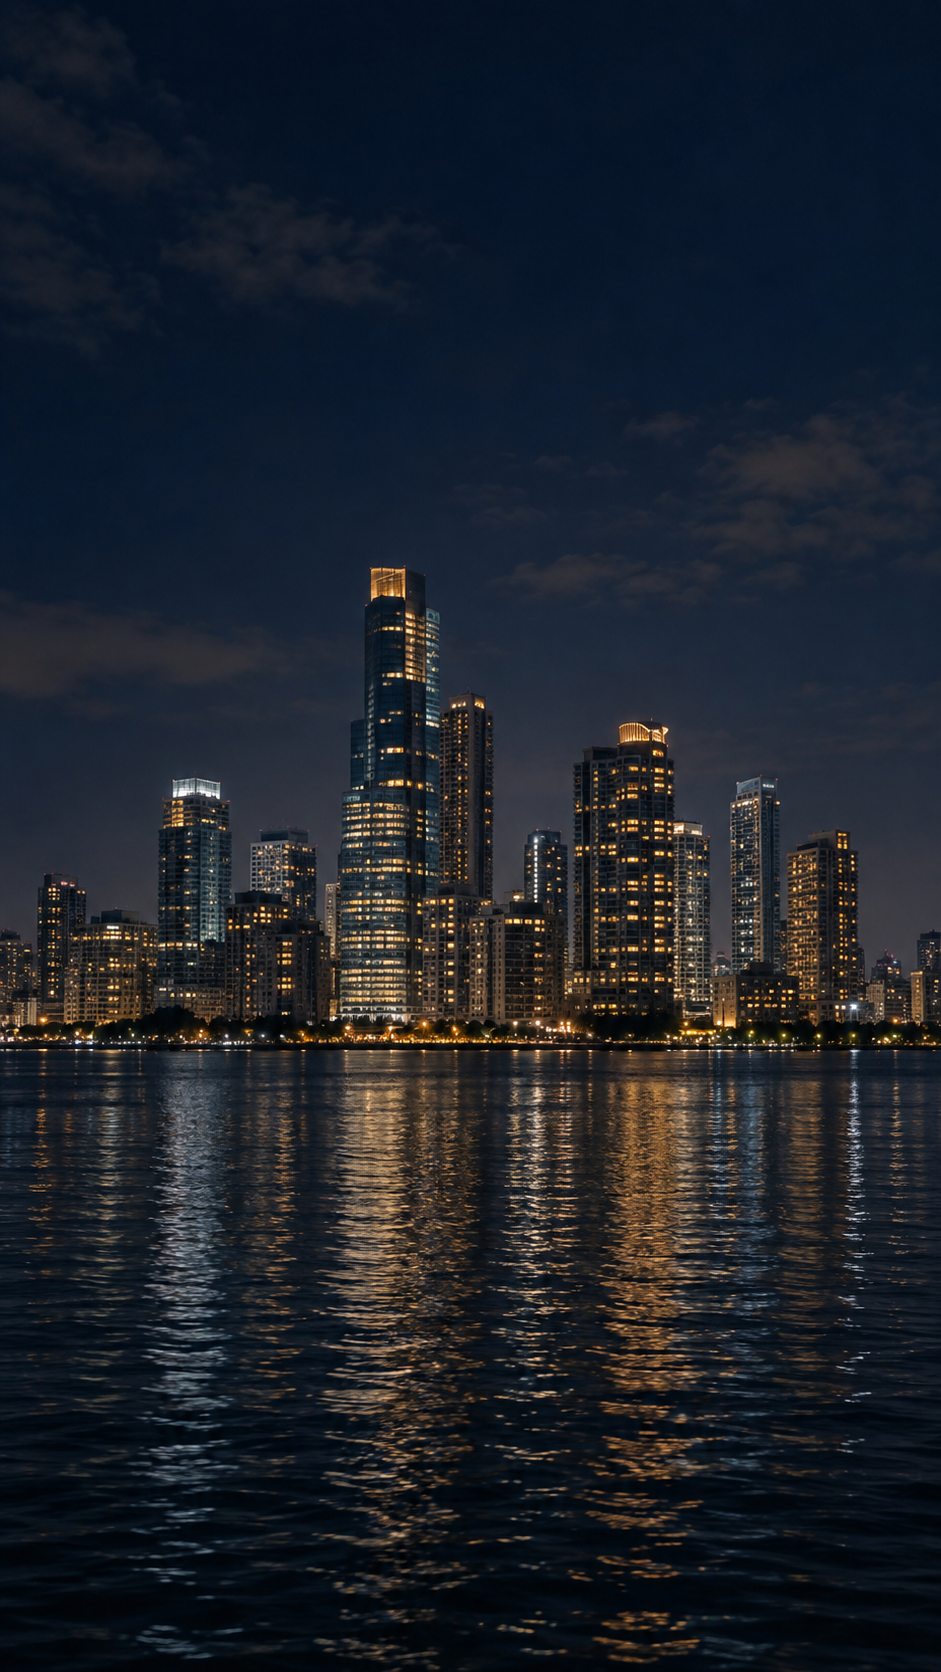
Do not brighten a night photo automatically. Start with the original file, decide which dark details make the scene recognizable, and create one separate edited copy only if those details disappear. Then upload that copy and judge the composition in the VIBE IN CASE editor. The screen preview can help you see placement, but it cannot guarantee exact printed brightness or color. VIBE IN CASE photo phone cases currently cost $35 each.
See the source and the actual editor preview
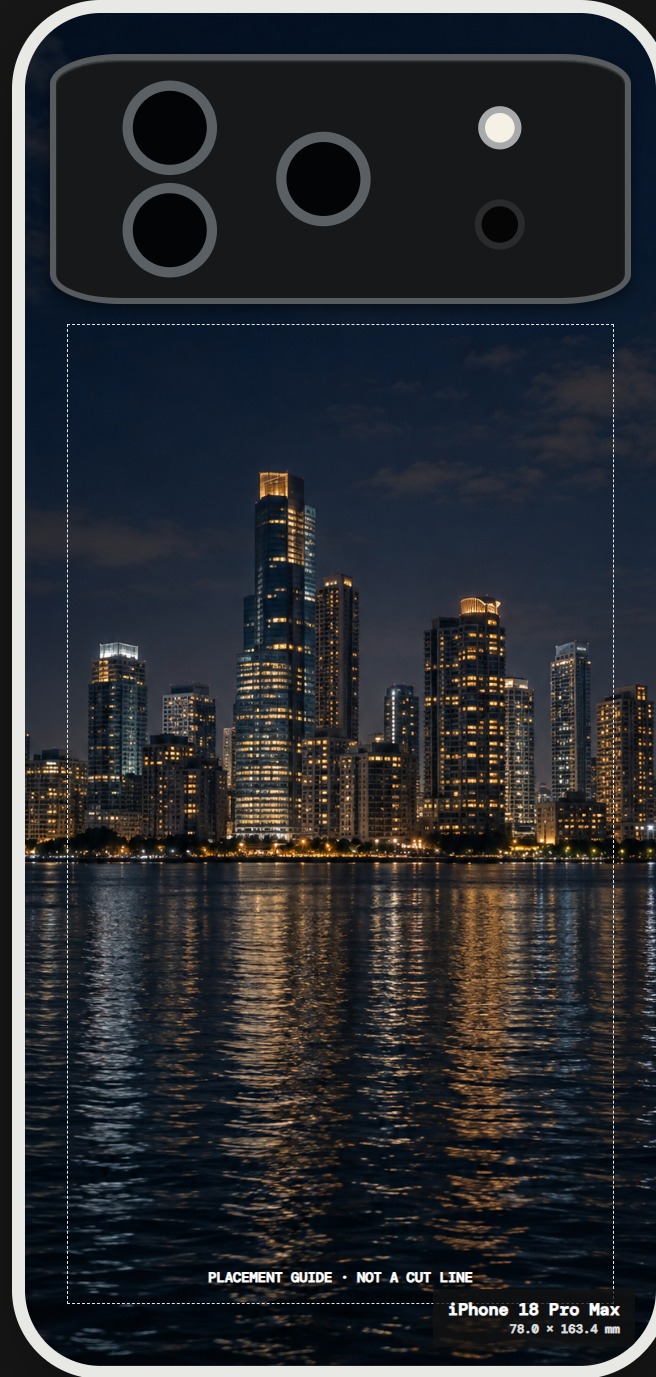
The first image above is an AI-created fictional waterfront skyline, not a customer photo or a real identifiable address. The second image is a real screenshot from the VIBE IN CASE editor using exactly that file with Clear Hard Polycarbonate Case and the iPhone 18 Pro Max option selected. It shows the camera area, the visible placement guide and the part of the skyline that remains on the case.
This is a composition demonstration, not a production sample. The generated file is 941 pixels on its shorter side, below the editor's current best-results recommendation of at least 1500 pixels on the shortest side. It is useful for showing where the dark sky, buildings and reflections land, but it does not prove print sharpness. If your camera original is larger, use the larger original rather than copying this file size.
Separate file brightness from screen brightness
A night image can look different as your phone changes display brightness, uses a vivid display setting or shows the photo against a bright app background. Those display changes do not add information to the file. Before editing, open the original at a normal screen level and look for the subject you care about: the building outline, a row of warm windows, a bridge, a moonlit cloud or reflections on water.
If those details are present and readable, the photo may not need a global brightness increase. Brightening the whole image can flatten the night atmosphere and make small lights lose their shape. If the subject disappears, work on a duplicate and lift the darker areas gently. Keep the original untouched so you can compare rather than repeatedly saving over it.
Choose one detail the case must keep
A tall case has less room than a full camera frame. Decide what makes the picture yours before adjusting exposure. In the fictional example, the central tower and the band of waterfront lights carry the scene. The large dark sky gives the camera area breathing room, while the reflections keep the lower half from becoming a featureless black block.
Your photo may use a different anchor. It could be a lit sign you have permission to reproduce, a person's silhouette, a mountain edge or one bright window. Keep that anchor away from the camera opening and the outer guide. If the only recognizable detail sits at an edge, consider a different crop before making the image brighter.
Make one careful edit, not a rescue attempt
Duplicate the original and make a small, reversible adjustment. Raise shadow detail only until the important shapes are visible. Watch bright windows, streetlights and reflected highlights so they do not turn into large blank patches. Compare the edited copy with the original at the same screen brightness. The better file is the one that keeps the night feeling while making the chosen subject easier to identify.
Do not rely on a filter name as evidence that the file is ready. “Night,” “vivid” or “auto enhance” can mean different things in different apps. The VIBE editor accepts PNG, JPG and WebP files up to 12 MB, but acceptance only confirms the file can enter the tool. It does not certify resolution, focus, color accuracy or final print appearance.
Select the case and phone before final placement
Open the VIBE IN CASE custom studio, choose a case material and select the exact phone model before fine-tuning the picture. The demonstration uses Clear Hard Polycarbonate Case. Clear Flexible TPU Case is another current option in the same studio. Other finishes are also shown there, but the option list and model availability should be checked live rather than inferred from this article.
The screenshot uses Smart Arrange, which filled the available case area and kept the camera region clear. The dashed outline is explicitly labeled as a placement guide, not a cut line. Use it to review the relationship between the camera area and your subject, then let the stated human production check handle the matching shell. Do not treat the preview as a manufacturing template.
Check the picture twice before saving
First, look at the full preview at a comfortable screen level. Can you still identify the main subject without zooming in? Second, reduce your display brightness for a moment and check whether the composition becomes an undifferentiated dark field. This comparison is only a practical screen check. It cannot predict the printer, case surface or every viewing condition.
If the picture is too dark, return to the duplicate file and make one modest change. If the highlights are already harsh, do not keep raising overall brightness. A source with missed focus, heavy compression or very small dimensions should be replaced with the original camera file when possible. Editing cannot recreate detail that is absent.
Save the design, then review the order details
When the placement is clear, use Save design & add to bag or Buy now. Review the VIBE IN CASE brand, selected material, exact phone model, preview and quantity before continuing. The studio currently displays $35 for one custom phone case, free standard U.S. shipping to eligible addresses and included applicable sales tax. Read the live order summary and VIBE IN CASE shipping and returns for the terms that apply.
The studio is hosted on moodincase.com because VIBE IN CASE uses the shared design and checkout service. Confirm the VIBE IN CASE label at the top. This guide does not create an order, charge a payment method or send an image to the production team.
Create a case from your own night photo →
Before you start
Should I brighten every night photo before uploading it?
No. First inspect the original file at normal screen brightness. Make a separate edited copy only when the subject disappears into the shadows or the important lights are hard to distinguish.
Does the editor preview guarantee the printed brightness?
No. The editor is useful for checking composition, model and visible detail, but it is not a printed sample or an exact screen-to-print color promise.
Is the skyline photo a customer image or finished case?
No. It is a wholly fictional AI-created city used for this guide. The second image is a real VIBE IN CASE editor preview made from that same file, not a customer order or production photograph.
What if my photo is smaller than the editor recommendation?
Use a larger original when you have one. A smaller file can demonstrate placement, but enlarging it does not recreate missing detail or prove that it is suitable for printing.